
Introduction
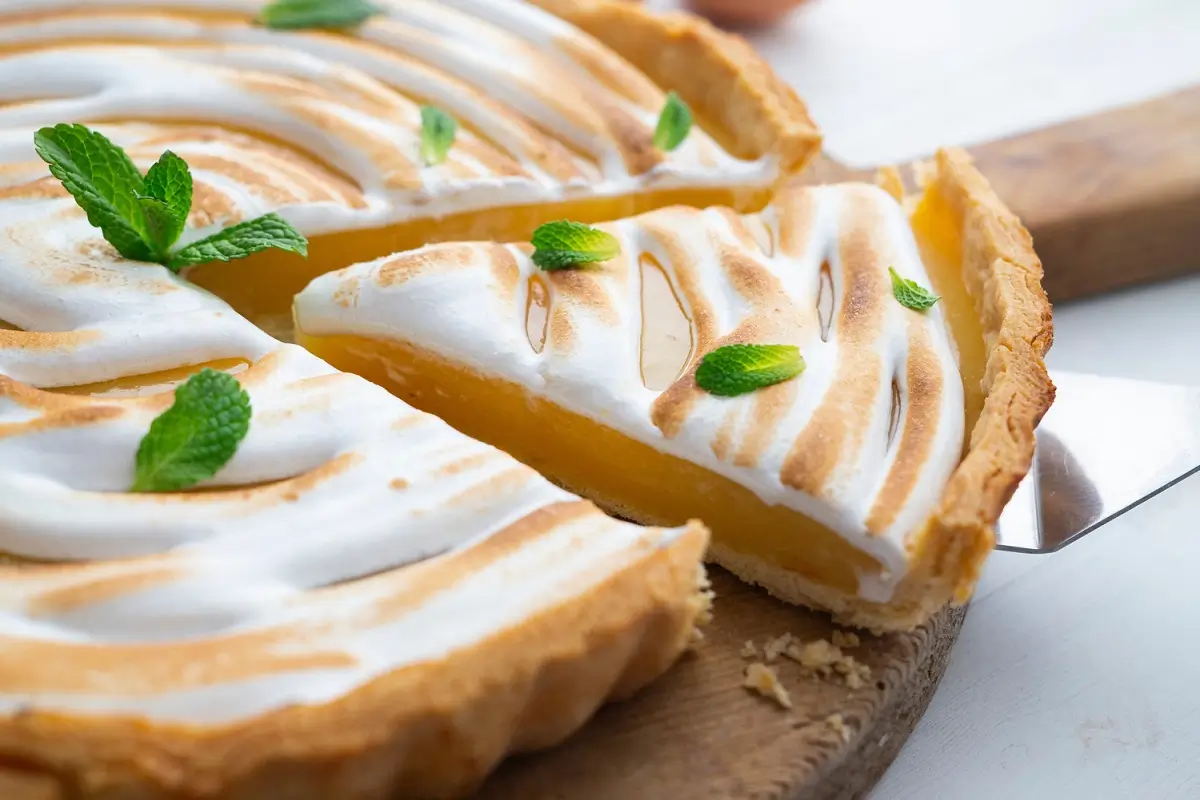
Ah, the classic lemon meringue pie! It’s a delightful blend of tangy, sweet, and creamy flavors, all encased in a flaky crust. But let’s talk about a unique twist to this beloved dessert – the Clear Lemon Meringue Pie. This version stands out with its crystal-clear filling, offering a visually stunning and equally delicious experience.
Essential Ingredients for Clarity
To achieve the signature clarity in your pie, it’s vital to pick the right components. Start with the lemons. Opt for fresh lemons, as they provide not only the best flavor but also the perfect acidity level for the clear filling. Next, focus on sweeteners. A fine balance between granulated sugar and other clear sweeteners like Caster sugar ensures sweetness without cloudiness. Lastly, the thickening agents play a crucial role. Traditional cornstarch might cloud your filling; hence, gelatin is the go-to choice for maintaining that sought-after transparency.
The Perfect Crust
Every great pie starts with an impeccable crust. For a flaky and golden crust, you’ll need a combination of flour, butter, and just the right amount of water. It’s all about keeping the ingredients cold and handling the dough minimally to avoid toughness. Pre-baking the crust is another crucial step. It helps in preventing a soggy bottom and sets the stage for your clear filling. Remember, a great crust is the foundation of your clear lemon meringue pie.
Creating the Clear Lemon Filling
The heart of your clear lemon meringue pie lies in its crystal-clear lemon filling. Achieving this transparency requires precision and careful attention to detail. Let’s dive into the step-by-step process of creating the perfect clear lemon filling.
Step-by-Step to Make a Clear Lemon Meringue Pie Recipe
Ingredients You’ll Need:
- Fresh Lemons: The star of the show! Opt for fresh lemons to extract the juice and zest. Fresh lemon juice provides the best flavor and clarity.
- Granulated Sugar: This sweetens the filling while preserving its transparency. You can adjust the amount of sugar to suit your taste.
- Gelatin: Gelatin is the secret ingredient that gives your filling its clear and jewel-like appearance. It’s essential for achieving the desired result.
Instructions:
- Lemon Zest: Begin by washing and zesting a couple of lemons. The zest not only adds a burst of lemony flavor but also contributes to the pie’s visual appeal.
- Lemon Juice: Squeeze the lemons to extract their juice. You’ll need about 1 cup of fresh lemon juice. Strain the juice to remove any seeds or pulp.
- Sugar Dissolution: In a saucepan, combine the fresh lemon juice and granulated sugar. Use a whisk to ensure the sugar is fully dissolved. This step is crucial for maintaining clarity in the filling.
- Gelatin Preparation: In a separate bowl, sprinkle gelatin over a quarter cup of cold water. Allow it to sit for a few minutes to bloom.
- Heating Gelatin: Gently heat the gelatin mixture over low heat, stirring until it becomes clear and fully dissolved. Avoid overheating, as this can affect the gelatin’s setting ability.
- Combine Ingredients: Pour the warm gelatin mixture into the lemon-sugar mixture, stirring well to combine. You’ll notice the mixture becoming clearer as you incorporate the gelatin.
- Cooling and Clarifying: Let the combined mixture cool at room temperature. As it cools, the gelatin will work its magic, clarifying the filling. You’ll start to see the transparency develop.
Preparation:
- Pie Crust Preparation: While the filling is cooling, ensure that your pie crust is pre-baked and ready to go. A pre-baked crust helps prevent sogginess.
- Filling Assembly: Once the filling has reached room temperature and achieved the desired clarity, carefully pour it into your pre-baked pie crust. Take your time to ensure an even layer.
- Chilling: Place your clear lemon meringue pie in the refrigerator and allow it to chill for at least 4-6 hours, or ideally overnight. This extended chilling time ensures the filling sets beautifully.
- Meringue Crown: After the filling has set, it’s time to crown your pie with the perfect meringue. Follow the steps for creating a stable meringue, as discussed earlier.
- Browning the Meringue: Bake the pie until the meringue is lightly browned, achieving that delightful toasted appearance.
Once you’ve followed these steps meticulously, you’ll be rewarded with a clear lemon meringue pie that not only tastes refreshingly lemony but also boasts a mesmerizing clarity that’s sure to impress your guests.
Mastering the Meringue
The meringue atop your clear lemon meringue pie is like the fluffy crown jewel of your creation. It adds a layer of sweetness and texture that perfectly complements the zesty lemon filling. To master this essential element, let’s dive into the art of creating the perfect meringue.
Ingredients and Method for a Stable Meringue
To whip up a stable and visually appealing meringue, you’ll need:
Egg Whites: Start with fresh egg whites at room temperature. Egg whites are the foundation of your meringue, providing the structure and stability needed to create those iconic peaks.
Sugar: Granulated sugar is the primary sweetener for meringue. It not only adds sweetness but also stabilizes the egg whites. For a traditional meringue, use about 1/4 cup of sugar per egg white. However, you can adjust the sweetness to your preference.
Lemon Juice: A hint of lemon juice is often added to meringue for flavor and to help stabilize the egg whites. It also complements the lemony theme of your pie.
Steps to create the perfect meringue
- Clean Equipment: Ensure that your mixing bowl and beaters or whisk are clean and free of any grease or residue. Even a tiny amount of grease can hinder the egg whites from reaching their full volume.
- Start Slow: Begin whipping the egg whites on low or medium-low speed until they become frothy. This initial step helps create small bubbles within the egg whites.
- Gradually Add Sugar: While continuing to beat the egg whites, gradually add the granulated sugar, one tablespoon at a time. This gradual incorporation helps the sugar dissolve and prevents a gritty texture in the meringue.
- Increase Speed: Once all the sugar is added, increase the mixer speed to medium-high or high. Continue beating until the meringue reaches stiff peaks. This means that when you lift the beaters or whisk, the meringue holds its shape, and the peaks stand upright.
- Add Lemon Juice: Just before your meringue reaches stiff peaks, add a small amount of lemon juice. This enhances the flavor and stability of the meringue.
- Avoid Overbeating: Be cautious not to overbeat the meringue, as this can lead to a grainy texture. Stop beating as soon as you achieve stiff peaks.
Tips for Achieving Perfect Clear Lemon Meringue Pie
To create meringue with perfect peaks, consider these tips:
- Fresh Egg Whites: Always use fresh egg whites, as older ones can be less stable.
- Room Temperature: Ensure that the egg whites are at room temperature, as they whip up better.
- Cream of Tartar: If you’re concerned about stability, add a pinch of cream of tartar when whipping the egg whites.
- Even Sugar Distribution: When adding sugar, sprinkle it evenly across the egg whites’ surface to help it dissolve uniformly.
- Avoid Moisture: Ensure that no moisture, including egg yolk, comes into contact with the egg whites, as it can hinder the foaming process.
With these techniques and tips, you’ll be able to create a meringue that not only looks impressive but also tastes divine. It’s the final touch that elevates your clear lemon meringue pie to a culinary masterpiece.
Baking and Timing
When it comes to baking, precision is key. Set your oven to the right temperature, usually around 350°F, to ensure that the crust bakes to golden perfection without burning. The baking time is crucial – it’s what sets the filling and gives the meringue its lightly toasted top. Keep a watchful eye on your pie to catch that moment when everything comes together in harmony.
Troubleshooting Common Issues
Even with the best intentions, baking sometimes throws us curveballs. Here are some common problems you might encounter while making your clear lemon meringue pie and how to tackle them:
1. Addressing Cloudy Filling: If your filling appears cloudy, it might be due to inadequate straining of the lemon mixture or overcooking the gelatin. To fix this, strain the mixture again through a fine sieve or cheesecloth before pouring it into the crust. Additionally, ensure that the gelatin is only heated to the specified temperature, as overheating can lead to cloudiness.
2. Fixing Meringue-Related Problems: Meringue can be tricky, and issues like weeping (syneresis) or shrinking can occur. To prevent weeping, make sure to spread the meringue over the hot filling, sealing the edges well. Baking it immediately after spreading helps as well. For shrinking, ensure that the meringue touches the crust’s edge to create a seal.
Presentation and Serving
The visual appeal of your clear lemon meringue pie is just as important as its taste. Here are some creative ideas to make your dessert truly captivating:
- Lemon Zest Sprinkle: A fine dusting of lemon zest on top of your meringue not only enhances the citrusy aroma but also adds a pop of color.
- Fresh Lemon Slices: Arrange thin lemon slices in a circular pattern on top of the meringue. It not only looks stunning but also provides a hint of what’s inside.
- Edible Flowers: Delicate edible flowers, like pansies or violets, can add a touch of elegance and a burst of color to your presentation.
- Glass Plates: Serving your clear lemon meringue pie on glass plates can enhance the transparent effect and create a visually striking contrast.
Nutritional Information about Clear Lemon Meringue Pie
If you’re watching your calorie intake or have specific dietary preferences, it’s good to have an idea of the nutritional content of your clear lemon meringue pie. Here’s a rough estimate for a typical serving:
- Calories: Approximately 350-400 calories per slice.
- Fat: Around 15-20 grams, primarily from the butter in the crust.
- Sugar: Approximately 30-40 grams, depending on your sweetener choices.
- Protein: About 5-6 grams from the egg whites.
Dietary Adaptations and Beverage Pairings
- Gluten-Free Option: For those with gluten sensitivities or preferences, you can make a gluten-free crust using almond flour or a gluten-free flour blend.
- Vegan Version: To create a vegan clear lemon meringue pie, replace the egg whites with aquafaba (the liquid from canned chickpeas) for the meringue, and use a plant-based butter substitute for the crust.
Beverage Pairings
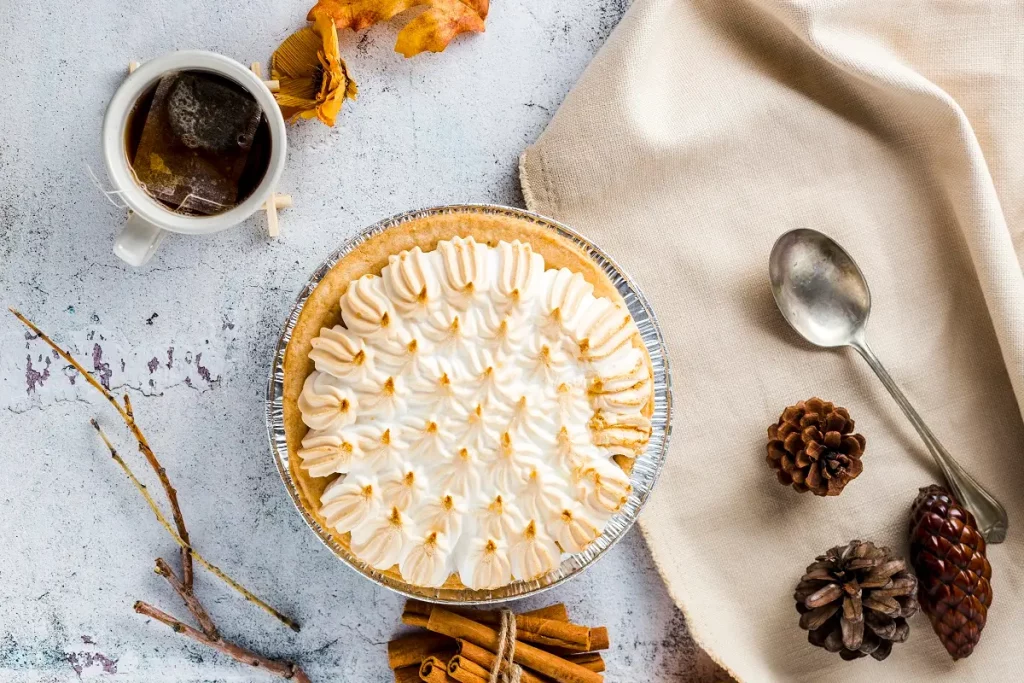
Pairing the right beverage with your clear lemon meringue pie can elevate the dining experience. Here are some options:
- Hot Tea: A cup of black or green tea complements the citrusy notes of the pie while offering a comforting contrast.
- Sparkling Water: The effervescence of sparkling water cleanses the palate and enhances the refreshing quality of the pie.
- Lemonade: If you’re a lemon lover, a glass of homemade lemonade alongside your pie is a match made in citrus heaven.
- Champagne or Prosecco: For a touch of sophistication, serve your clear lemon meringue pie with a chilled glass of champagne or prosecco.
Cooling and Setting
After the careful baking process, it’s time to ensure that your clear lemon meringue pie cools and sets to perfection. This crucial step ensures that all the elements of your pie come together harmoniously, delivering that delightful slice of dessert heaven.
Techniques for Cooling
- Room Temperature Cooling: Once your clear lemon meringue pie emerges from the oven, resist the urge to dig in immediately. Place it on a cooling rack at room temperature. Allowing the pie to cool gradually helps prevent sudden temperature changes that could cause the filling to crack or separate.
- Avoid Draughts: Ensure that the cooling area is free from drafts. Drafts can lead to uneven cooling, which may result in condensation forming on the surface of the pie, compromising its clarity.
- Covering: While cooling, it’s a good practice to loosely cover the pie with a clean kitchen towel or a piece of parchment paper. This covering helps protect the meringue from drying out and keeps it looking fresh.
Ensuring the Pie Sets Correctly
The setting is the stage where the magic of your clear lemon meringue pie truly happens. Here’s how to make sure it sets correctly:
- Room Temperature Setting: Allow your pie to set at room temperature for at least two hours. This time allows the gelatin to work its magic, creating that desirable clear filling.
- Refrigeration: After the initial room temperature setting, transfer the pie to the refrigerator. It’s best to refrigerate it for a minimum of 4-6 hours, or ideally overnight. This extended chilling time ensures that the filling achieves its crystal-clear consistency.
- Avoid Freezing: While it’s tempting to expedite the setting process by placing the pie in the freezer, this is not recommended. Freezing can alter the texture of the filling and the meringue, leading to undesirable results.
Testing for Readiness
To check if your clear lemon meringue pie has been set properly, gently press your finger on the meringue. It should feel firm to the touch and not stick to your finger. The filling should be beautifully translucent, showcasing the bright lemony goodness underneath.
As tempting as it may be, refrain from cutting into the pie too soon. Patience is key in this final stage, and the reward is a perfectly set, visually stunning clear lemon meringue pie that’s ready to be enjoyed.
FAQS about Clear Lemon Meringue Pie
Q1: How to Make Clear Lemon Meringue Pie
- A1: Making clear lemon meringue pie involves a meticulous process. Start by selecting fresh lemons and extracting their juice and zest. Combine the lemon juice with granulated sugar, dissolve gelatin separately, and then combine the two mixtures. Allow the filling to cool and clarify. Pour it into a pre-baked pie crust, top it with meringue, and bake to perfection. Refrigerate for a few hours to set, and you’ll have your clear lemon meringue pie!
Q2: Why Does Liquid Come Out of My Lemon Meringue Pie?
- A2: If liquid is seeping from your lemon meringue pie, it’s likely due to a weeping meringue. Weeping occurs when moisture separates from the meringue and forms a liquid layer between the meringue and the filling. To prevent this, make sure the meringue touches the crust’s edge to create a seal before baking.
Q3: Why Is My Lemon Meringue Pie Weeping?
- A3: Lemon meringue pies can weep due to various factors. One common reason is over-baking the meringue, causing it to shrink and release moisture. Weeping can also occur if the meringue is not spread over the hot filling or if the pie is not consumed promptly.
Q4: Why Does My Lemon Meringue Pie Taste Like Metal?
- A4: If your lemon meringue pie has a metallic taste, it might be due to a reaction between the filling and certain types of cookware, especially aluminum. To prevent this, use non-reactive cookware like glass or ceramic when making the filling.
Q5: Is It OK to Eat Lemon Meringue Pie?
- A5: Absolutely! Lemon meringue pie is a delicious and safe dessert to enjoy, provided it’s prepared and stored correctly. Make sure to follow proper food safety guidelines, especially when using eggs in the meringue. If stored in the refrigerator, it can be consumed within 24 hours for the best quality.
Conclusion
As we near the end of our journey through the world of clear lemon meringue pie, we hope you’re feeling inspired to embark on your baking adventure. This dessert offers a perfect balance of refreshing lemony sweetness, delicate texture, and culinary artistry.
Creating a clear lemon meringue pie is not just about following a recipe; it’s about embracing the joy of baking and the satisfaction of presenting a dessert that’s as pleasing to the eyes as it is to the taste buds. So, gather your ingredients, follow the steps meticulously, and let your culinary creativity shine through.
- History of Meringue
- Lemon Nutrition Benefits
- Lipton Meatloaf Recipe
- Pastina: Italy’s Comfort Food & Simple Charm